Monday, May 16, 2011

A Bun in My Oven

Dear Family, Friends and A. Daily Kitchen Followers,

Hubby and I could not be happier, or any more excited to share the wonderful news-There is a bun in my oven.  That’s right, I’m pregnant!  We feel so blessed. 

We just got back from our first appointment and the doc says:  “All looks perfectly normal.”  Our first ultra sound was scheduled for right after the doc’s appointment and we sat there is silence as the technician showed us our baby for the first time.  All I can remember is thinking, “Wow!  We’re so blessed!  So, so blessed!”  As soon as we walked out of the office Husband turned to me and said “We are so blessed, so unbelievably blessed!” and I couldn’t agree with him more.

 Baby Daily:  Measuring in at 2.1 cm 
and available for cuddling as of January 3, 2012

Oh, and of course I’ve already been doing all the research of what to eat and what not to eat so you will definitely see more recipes (and pregnancy/baby facts) from the healthier side of my spatula.  Oh and I can’t wait to make baby food.  Okay, okay, I’m getting a little ahead of myself, but this is all very exciting.  Yay!

Fun fact:  I’m approximately 6 weeks pregnant, and our little baby is the size of an orange seed right now.

XoXo,
A. Daily & Hubby (and our little orange seed)

Thursday, April 21, 2011

Roasted Salmon with Balsamic-Honey Mustard Glaze


Have I mentioned that I work at a gym?  Not just any ol’ gym though, a kettlebell gym.  I’ve been there a few months now and well, I think its time I start looking like I work at MBody Strength.

My brother-in-law, THE Marcus Martinez (HaH!), has ever so nicely encouraged me to work out and eat better.  Simple enough, right?  No, I’m fighting him every bit of the way with the “eat better” of it all (and occasionally I’ll throw in a tantrum about the working out too, okay, maybe more than occasionally).

So, here I am, giving in for a night and tapping into the healthier side of my spatula.  Tonight’s dinner menu:

Roasted Salmon with Balsamic-Honey Mustard Glaze
Roasted Carrots · Rice Pilaf · Balsamic Coated Green Beans


Roasted Salmon with Balsamic-Honey Mustard Glaze
Serves 3-4

18-24 Oz. Fresh Salmon Filet

½ Cup Extra Virgin Olive Oil
¼ Cup Balsamic Vinegar
1 ½ Tbs. Agave Nectar
2 Tbs. Honey Dijon Mustard
½ tsp. Golden Brown Sugar, packed
Kosher Salt, to taste
Fresh Ground Pepper, to taste

Preheat your broiler.

Line a baking sheet with aluminum foil and lightly brush a thin layer of olive oil onto the foil.  Place the salmon onto the baking sheet, skin side down.

In a bowl, combine all ingredients for the glaze.  Once incorporated, generously brush the glaze onto your salmon.  Reserve any leftover glaze.

Broil for 5 minutes.

Apply reserved glaze while salmon is in the oven.  Return to the broiler for 3-5 minutes (or until flakey all the way through).


Tasty Tips/Finds:
·   You will likely have leftover glaze.  I suggest pouring about half into a container before your first brush, for later use (and to avoid any raw fish contamination).  It also serves as a great marinate for steak.
·   Position the salmon 4-6” from the broiler.
·   When returning the salmon to the broiler leave the door cracked just ever so slightly.

Monday, April 11, 2011

A Little Summer Preparation


Dear Warm Weather,

Come and stay for a while!  I am new to this backyard and would very much like to show my owners what I can do.  Please and thank you!

Ready to Grill,
The Daily's New BBQ


Hubby and I were cleaning up the backyard this past weekend and realized that our old barbeque just wouldn’t cut the mustard for what we have in store for this summer.  After all, he did just order over 50 steaks and 20+ hamburgers (Reminder:  It’s just the two of us).  There’s even talk of a volleyball net going up in the very near future…

Monday, March 21, 2011

Sister Fiesta Meets Salsa Throwdown

When I knew that my sister would be coming to visit for the weekend I knew that we had to spend our time together in the kitchen.  You see, it’s been a while since my sister, Kim, and I have been able to spend some quality time together.  So long, in fact, I don’t think she’s ever tasted my cooking.  Remember, ‘I am simply a newly married wife learning my way around the kitchen’.  I had to get her in my kitchen and show her that she’s not the only one who can whip a spatula around- Or in this case, dice a Jalapeno. 

Like I’ve mentioned before, I’m competitive and well, it runs in the family.  No, no, no we couldn’t just spend some good ol’ fashion time whipping something together in the kitchen!  It had to be a throwdown.  Had to be!  And, being that I like a challenge I chose salsa, her specialty.  The thought was that victory would be just that much more rewarding and maybe, just maybe, I liked the idea of sticking it to her a little.  Besides, it was a win-win; No matter what I was going to enjoy some amazing salsa.  So with that, we decided to channel the 25-ish% of Latina in us and cook fiesta style.


Salsa
Kim’s:  Salsa de la Winner · A. Daily’s: Tomatillo Salsa
Tacos
Carne Asada · Shredded Chicken · Shrimp


Salsa de la Winner
Yields 6 Servings

8 California Dried Chiles
8 Japanese Dried Red Chiles
3 Black Dried Chiles
1 ½ White Onion
4 Tomatillios
2 Small Tomatoes
5 Garlic Cloves
2 Limes
Cilantro (1 Bushel)
Salt & Pepper, to taste

Roast dried peppers.

Boil roasted peppers, ½ onion, tomatillios, and tomatoes.  Drain.

Using a food processor, process all ingredients together.    Add salt and pepper to taste.

Tomatillo Salsa
Yields 6 Servings

1 ½ Lbs. (8-10) Tomatillos
1 ½ Fresh Serrano Chiles (½ de-seeded)
Cilantro (1 Bushel)
4 Tbs. Fresh Lime Juice
2 Garlic Cloves
Pinch of Onion Powder
Kosher Salt (approximately 1/4 tsp.)
Ground Pepper

De-husk, wash (with warm water), remove stems and slice tomatillos in half.

Using a food processor, process all ingredients together.    Add salt and pepper to taste.

The Verdict:  Let's just say I want a rematch!  So here it is:  Family, Friends and A. Daily Kitchen Followers, you have the recipes, take them to YOUR kitchen and let me know what you think.

In other words, she won... (For now, that is).

Sunday, February 27, 2011

Sprinkle Time!


Not a Shower, but a Sprinkle.

When I started planning my sister-in-law’s Baby Sprinkle (not a Baby Shower) I was absolutely certain about two things:

I wanted it to be dessert themed!

And, I wanted to make a diaper cake!

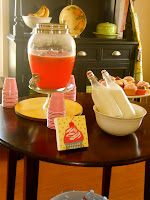
The Theme:  Cupcakes!  Sweets and Treats!  Ladybugs and Pink!   Instead of going to into all the detail, I’ll let the pictures do the talking.

The Sprinkle


Cupcakes
Vanilla Ladybugs · Chocolate · Strawberry · Lemon
“Strawberry Lemonade” · “Chocolate Covered Strawberry”
Sweets & Treats
Peanut Butter Blossoms · Snickerdoodles · Petit Fours
Strawberries and “Goo” · Chocolate Covered Strawberries

The Diaper Cake: Okay so, this doesn’t technically come from my kitchen.  But, it does belong in the “cake” category so it’s earned a spot on my blog…

I’ve been to just a handful of Baby Showers, but enough to know that those diaper cakes are adorable and a must-have at every shower.  So, I hopped on the internet and started exploring the how-to of it all.


Baby Shower Diaper Cake
Yields (1) 5-Tier Cake

223 New Born Diapers
223 Small Rubber Bands
9 Large Rubber Bands
6 X-Large Rubber Bands
2-3 Yards of Decorative Ribbon
Scissors
Hot Glue Gun/Hot Glue

Roll each individual diaper, and wrap each with a small rubber band.

Start with (1) diaper as your center point – Build each tier by placing diapers around the center point to form a complete circle.  Secure each complete “row” of diapers by using a larger rubber band to hold the diapers in place.  Repeat this process until the desired tier size is reached.  Then, repeat for each tier.

Here is the breakdown of diapers, rows, and rubber bands (RB):

Tier 1:  (7) Diapers; (1) Row; (1) Large RB
Tier 2:  (18) Diapers; (2) Rows; (2) Large RB
Tier 3:  (38) Diapers; (3) Rows; (2) Large RB; (1) X-Large RB
Tier 4:  (62) Diapers; (4) Rows; (2) Large RB; (2) X-Large RB
Tier 5:  (98) Diapers; (5) Rows; (2) Large RB; (3) X-Large RB

When all tiers have been constructed, cut appropriate lengths of decorative ribbon—One tier at a time, wrap the ribbon around the circumference of each tier.  Cut.  Hot glue the edges together. 

Stack each tier, biggest to smallest.  Decorate, optional.

This made for a very large and very sturdy cake.  I was able to make it weeks in advance, and get to work with the menu.  It was great! 

*Crafty Tips/Finds:
  • Many “How-To’s” also recommended using tape or pins to stabilize the diapers, but rubber bands allow for the diapers to remain usable.

Tuesday, February 8, 2011

Avocado-Mango Salsa

As promised, here is the recipe for Avocado-Mango Salsa.

Avocado-Mango Salsa
1 Whole Avocado, chopped
1 Whole Mango, chopped
¼ Cup Fresh Pineapple, chopped (Not Canned)
¼ Cup Fresh Corn
1 Tbs. Fresh Cilantro
Pinch Chili Powder
Pinch Red Pepper Flakes, to taste
Pinch Kosher Salt
½ -1 Tbs. Hot Sauce (Such as Tapatio), to taste
Juice from half a Lime

In a serving bowl, combine all ingredients (minus the avocado).  Mix together.  Let cool in the refrigerator for at least two hours (will store well for up to two days).  *Add the avocado 30 minutes prior to serving, return to the refrigerator.

Tasty Tips/Finds:
  • I’m sure this recipe would be GREAT with some red onion, but being that I’m an onion hater myself- I opted not to include it.

Carnitas

Over the past several months I have been oogling and drooling over the countless recipes on Pioneer Woman's Tasty Kitchen website, adding numerous ‘to-try’ recipes into my recipe box- Never actually getting to the testing stage though.  Well, alas, I finally took one to the kitchen. 

The original recipe:  Carnitas by The Noshery

This recipe seemed simple enough, sounded de-lish (the reviews agreed), and incorporated the crockpot.  Seriously, I <3 my crockpot!  Simple and de-lish aren’t so bad themselves.  I knew I had to try this recipe!  Because my husband and I are a picky duo, I decided to change it up just a bit (click on the attached link if you’d like to reference the original recipe).
 
Carnitas
Serves 4

2 ½ - 3 Lbs. Pork Shoulder, cubed
1 Cup Fresh Orange Juice
Juice from half a Lime
1 Tbs. Fresh Lemon Juice
1 Tbs. Kosher Salt
½ Tbs. Cumin
¼ tsp. Chili Powder
Pinch Garlic Powder
Pinch Onion Powder
Pinch Red Pepper Flakes
¼ Cup Fresh Cilantro
¼ Cup Fresh Pineapple (Not Canned)
2 Tbs. Olive Oil
1 Corona

Add all ingredients (minus olive oil and Corona) in your crockpot, stir.  Arrange contents in a single layer.  Set crockpot on low for 3-4 hours, turn to high for last hour.

When done, shred pork using two forks.  Set aside.

In a large skillet, heat olive oil on medium-high heat.  Add shredded pork, constantly stirring.  When edges are slightly crispy (about 2-3 minutes), reduce to medium-low heat.  Add ¼ cup Corona to meat, allowing the liquid to evaporate each time.  Repeat 2-3 times.

Serve on warm tortillas with your choice of toppings.

*I made an Avocado-Mango Salsa to go with this, and it was the perfect topping!  Recipe to follow.

Tasty Tips/Finds:
  • Crockpot timing will vary depending on size of cubed meat.  I cut mine in about 2” cubes.
  • Omit the Pineapple if you do not have fresh Pineapple.